用反射探头实现镜面反射
之前看到过一个日本人写的文章,关于如何使用Unity的反射探头来实现地板的镜面反射效果。
文章地址:http://nn-hokuson.hatenablog.com/entry/2016/10/17/202135。
核心代码很短,主要是根据下图所示实时更新反射探头的位置:
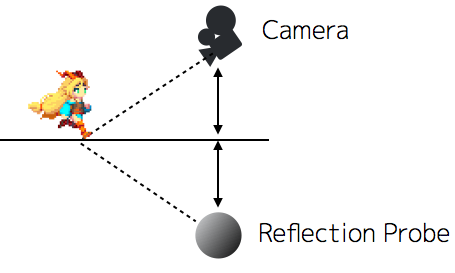
先贴一下位置计算的代码:
1
2
3
4
5
6
7
8
9
10
11
12
13
14
15
16
17
18
19
20
21
22
23
24
25
26
27
28
29
30
31
32
33
34
35
36
37
38
using System.Collections;
using System.Collections.Generic;
using UnityEngine;

public class ProbeReflection : MonoBehaviour
{
    public GameObject reflectionPlane;

    private ReflectionProbe probe;

    void Start()
    {
        this.probe = GetComponent<ReflectionProbe>();
    }

    void Update()
    {
        if(reflectionPlane == null)
        {
            return;
        }

        Camera camera = Camera.main;

        if(camera == null)
        {
            return;
        }

        float probeY = reflectionPlane.transform.position.y - camera.transform.position.y;

        this.probe.transform.position = new Vector3(
            camera.transform.position.x,
            reflectionPlane.transform.position.y + probeY,
            camera.transform.position.z
        );
    }
}
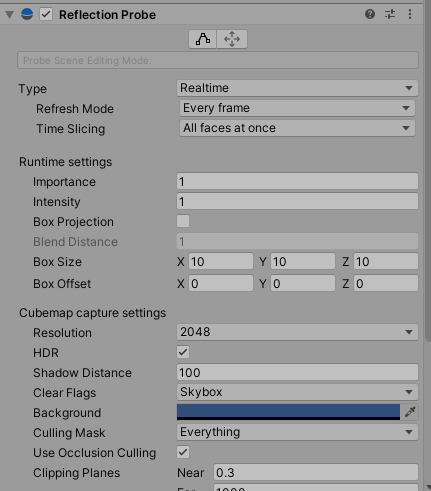
这里反射探头设置成实时(Realtime),Cubemap分辨率设置为2048:
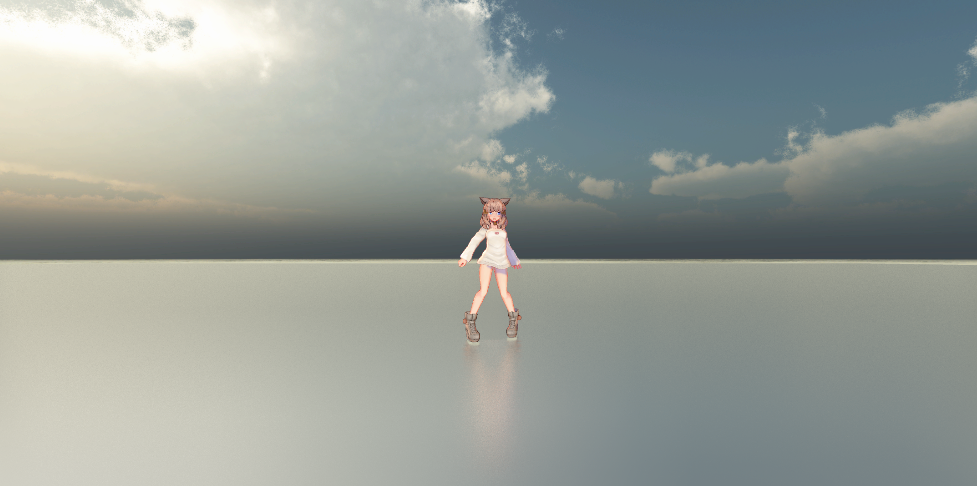
再把地板的金属度和光滑度都调到1,效果还是很好的,如下图:

性能问题
上图的镜面反射效果很好,不过需要关注一下性能问题。
这里做一个测试,还是刚才那个场景,把反射探头的 Time Slicing 设置为 No time slicing,即每帧完整的绘制一次环境,我们对比一下drawcall:
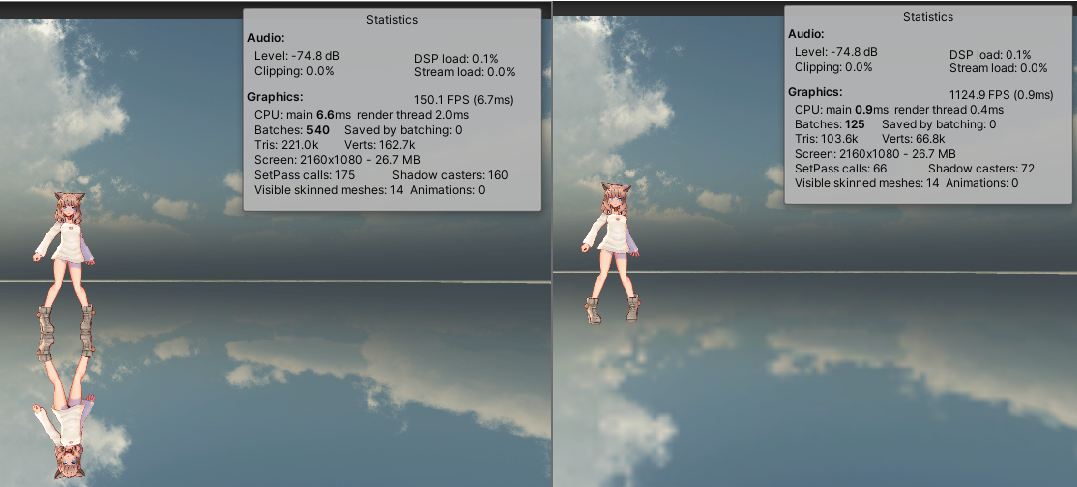
可以看到,如此一个简单场景,打开探头实时渲染后,drawcall从125翻到了540。
Unity的官方文档对此有如下说明:
Each of the six cubemap faces must be rendered separately using a “camera ” at the probe’s origin.
The probes will need to be rendered a separate time for each reflection bounce level (see documentation on Advanced Reflection Probes for further details).
The various mipmap levels of the cubemap must undergo a blurring process to allow for glossy reflections.
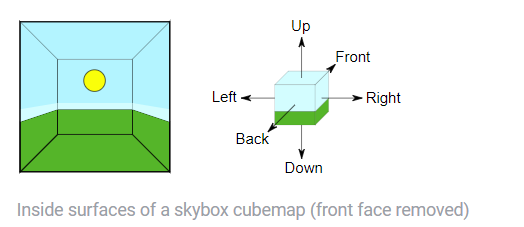
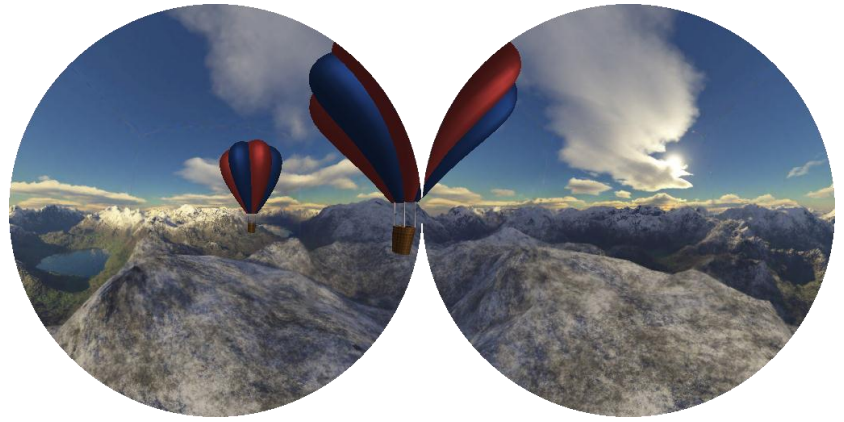
首先,环境会被渲染至cubemap,而cubemap的6个面都需要各自渲染,如下图:
其次,反射探头的环境绘制还会考虑到反弹,反弹的次数由Lighting面板全局控制,如下图:

最后,为了正确的计算间接高光,生成各级mipmap的时候还有一个blur操作。
性能优化
对于实时反射探头的性能优化,Unity官方列了如下几点:
-
降低cubemap的分辨率。
-
利用Cull Mask只渲染对环境影响较大的部分,比如天空盒。
-
限制绘制环境的频率,避免每帧绘制。
-
分帧完成环境绘制。
这里的优化方案属于常规方式。
双抛物面映射
此外,如果要求不是那么高,我们也不一定需要cubemap。
前项目在做环境的实时绘制时,用了另外一个方式:双抛物面映射。
关于双抛物面映射,知乎有一篇推导写得很好:详解双抛物面环境映射。
利用双抛物面映射,我们可以把cubemap的6次场景绘制降低为下图的2次:
截图源自 Dual Paraboloid Environment Mapping Whitepaper。
另外,前项目只生成mipmap,并不做blur操作,代码细节留到下篇再写。
关于粗糙度
之前为了测试镜面反射,我把金属度和光滑度都设置成了1。
现在给地板一点粗糙度,这里我把光滑度降低为0.8,效果如下:
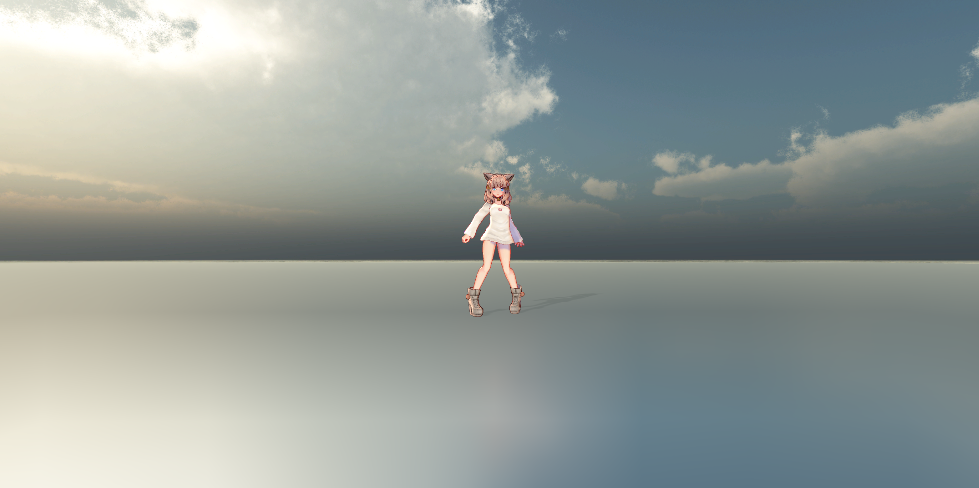
反射变得模糊了。
Unity会根据粗糙度来计算mipmap level,粗糙度越高mipmap level就越高,反射也就越模糊,代码如下:
1
2
3
4
5
6
7
8
9
10
11
12
13
14
15
16
17
18
19
20
#ifndef UNITY_SPECCUBE_LOD_STEPS
#define UNITY_SPECCUBE_LOD_STEPS (6)
#endif

half perceptualRoughnessToMipmapLevel(half perceptualRoughness)
{
    return perceptualRoughness * UNITY_SPECCUBE_LOD_STEPS;
}

half3 Unity_GlossyEnvironment (UNITY_ARGS_TEXCUBE(tex), half4 hdr, Unity_GlossyEnvironmentData glossIn)
{
    half perceptualRoughness = glossIn.roughness /* perceptualRoughness */ ;
    perceptualRoughness = perceptualRoughness*(1.7 - 0.7*perceptualRoughness);

    half mip = perceptualRoughnessToMipmapLevel(perceptualRoughness);
    half3 R = glossIn.reflUVW;
    half4 rgbm = UNITY_SAMPLE_TEXCUBE_LOD(tex, R, mip);

    return DecodeHDR(rgbm, hdr);
}
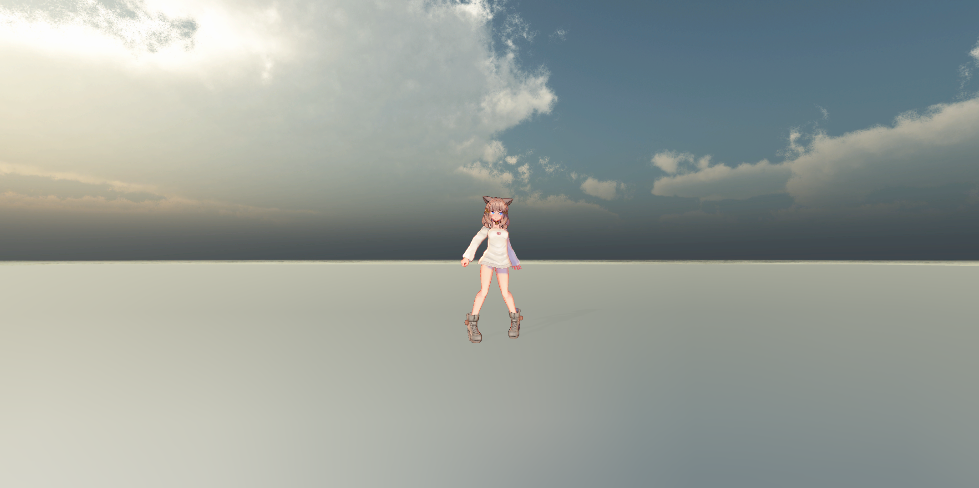
如果我们把光滑度再降低到0.7,反射的人物颜色几乎已经看不见了,如下图:
之前写过一个 屏幕空间反射的材质插件,同样是0.7的光滑度,通过多条反射射线采样平均,反射颜色的细节可以得到更多保留,如下图:
不过以上纯属广告,与本文无关。
好了,拜拜。